GEP user interface
Portal
The GEP portal is accessible at portal.geohazards-tep.eu.
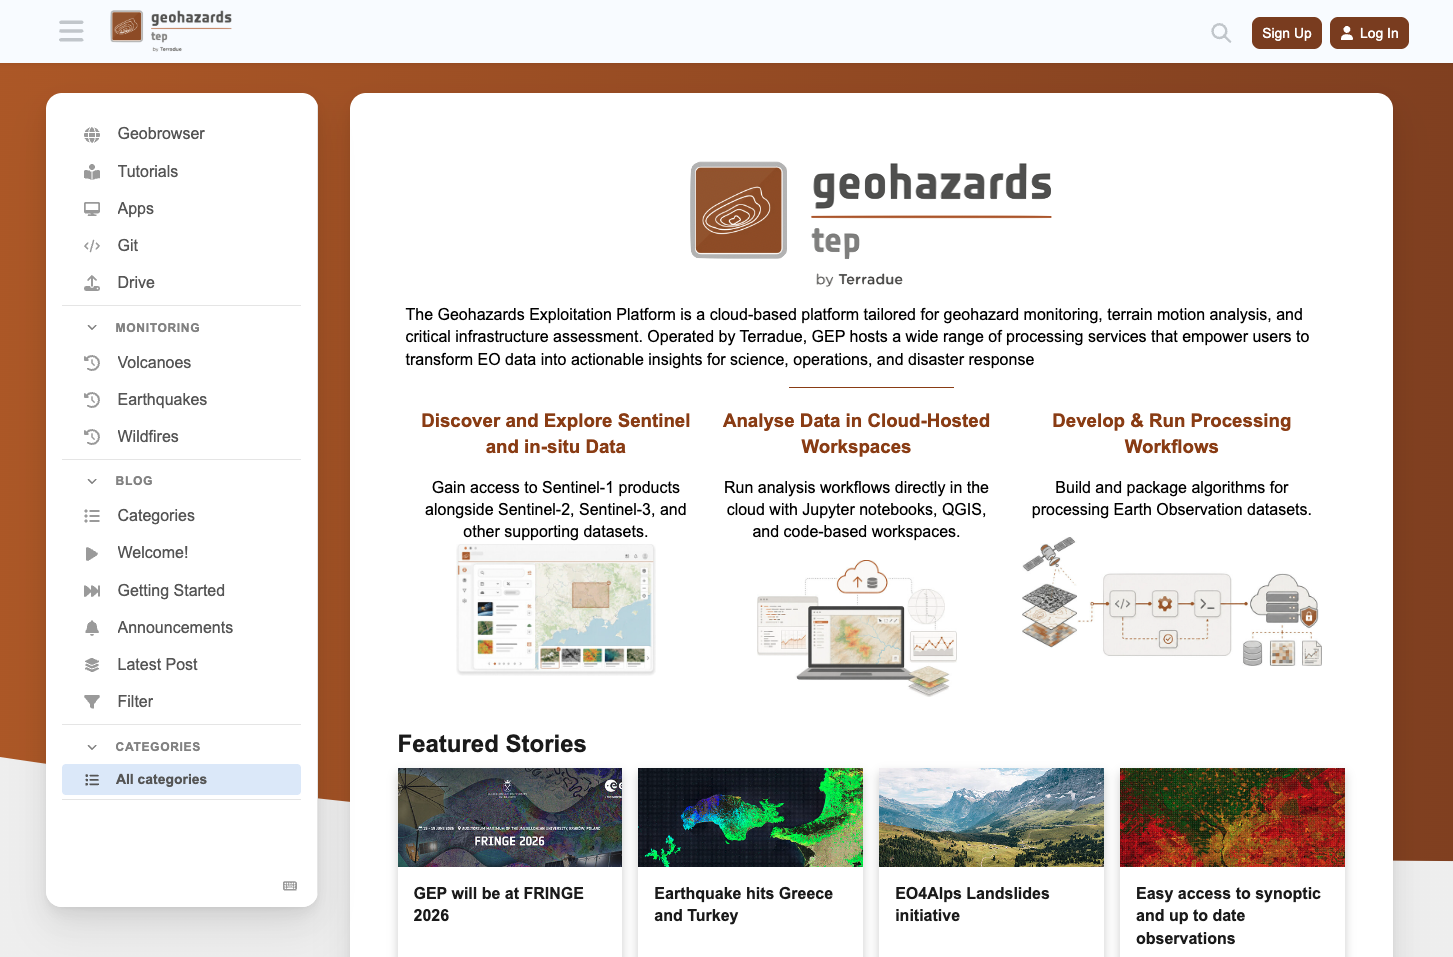
To access the platform, the user must click on the Log in button located in the upper right corner of the page and insert the given credentials.
Geobrowser
From the portal web page the Geobrowser is accessible by clicking on the dedicated icon on the upper part of the left panel.
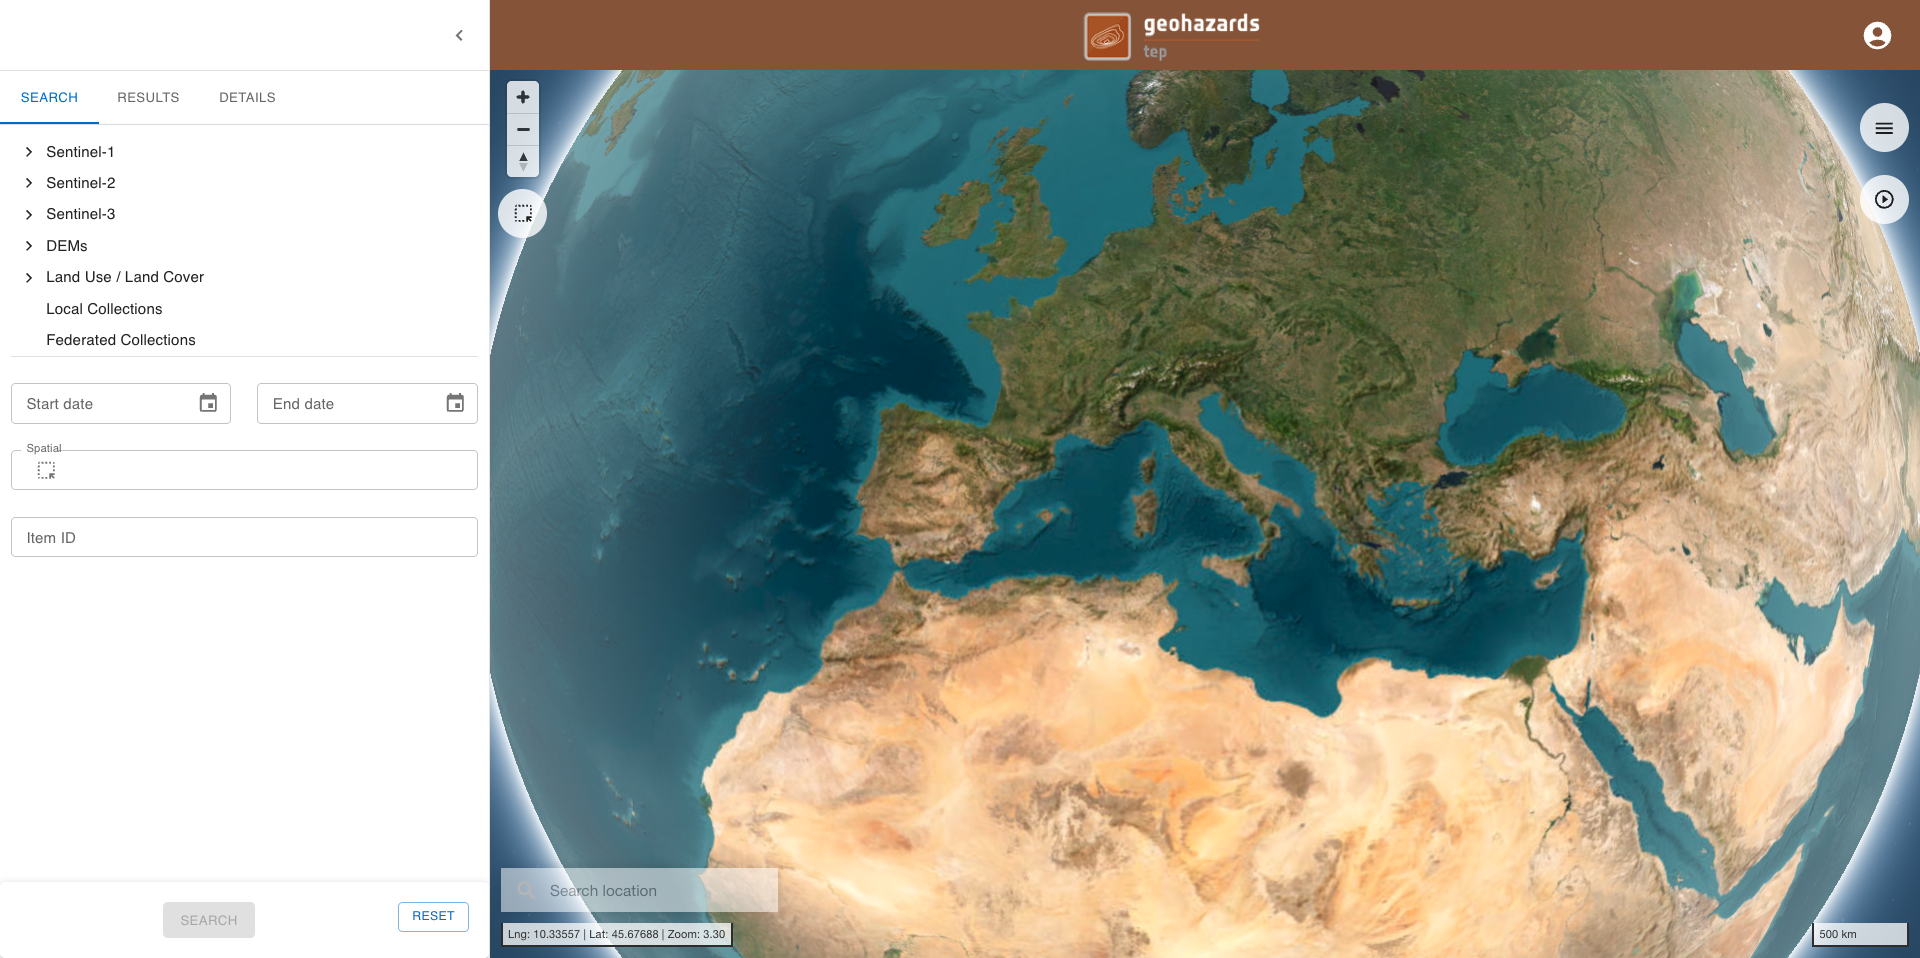
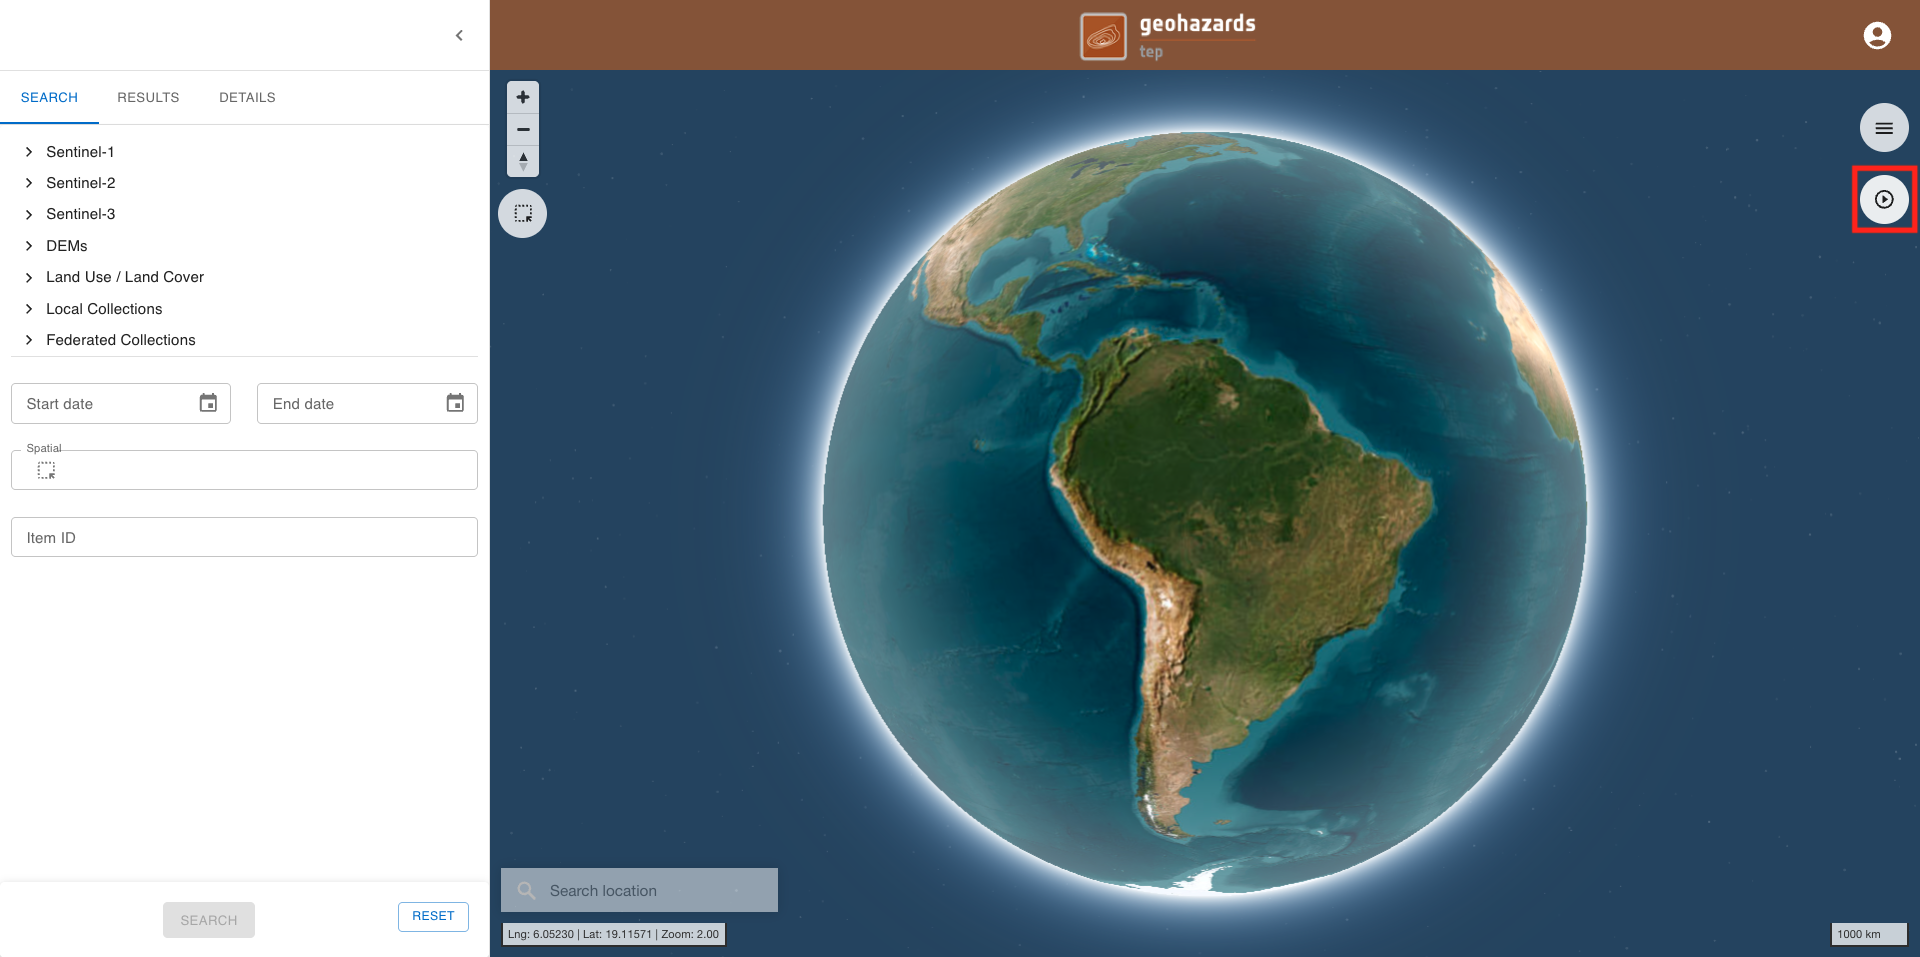
Once inside the Geobrowser of the GEP the user gets access to an essential and intuitive Graphic User Interface with a global map and with panels located on the right and on the left.
Left panel
On the left panel of the interface the user can find:
-
SEARCH tab: providing a list of collections and spatio-temporal filters to search for EO data, Auxiliary data or Results from processing.
-
RESULTS tab: providing the list of features resulting from a search.
-
DETAILS tab: providing the details of a single feature (e.g. toolbar to customize layers, metadata, legend).
Search tab
The SEARCH tab provides to the user the necessary tools to employ a search of EO data, Auxiliary data or Results from processing hosted in internal or external catalogues.
Typically collections are organized under:
-
Missions (Sentinel-1, Sentinel-2, Sentinel-3)
-
Local collections,
-
Federated collections.
The user must select one of the listed collections to employ a search.
The Start date and End date fields are located just below the list of queryable collections. Values can be easily defined using the date picker widget. The value inserted shall be in the form YYYY-MM-DD.
In the Spatial field the user can specify the geometry in WKT format to be used for the spatial search of items in the selected collection.
If needed, the Item ID field can also be used to search for a particular feature in a collection (e.g. Sen tinel-1 GRD) by filtering for its identifier (e.g. the ID of the GRD product).
For some collections (e.g. for Sentinel-1 GRD) some other fields can be used to further refine the search such as:
-
Orbit (Ascending, Descending or Both),
-
Relative orbit number (1 - 175),
-
Platform,
-
Polarization,
-
Storage,
-
Instrument mode.
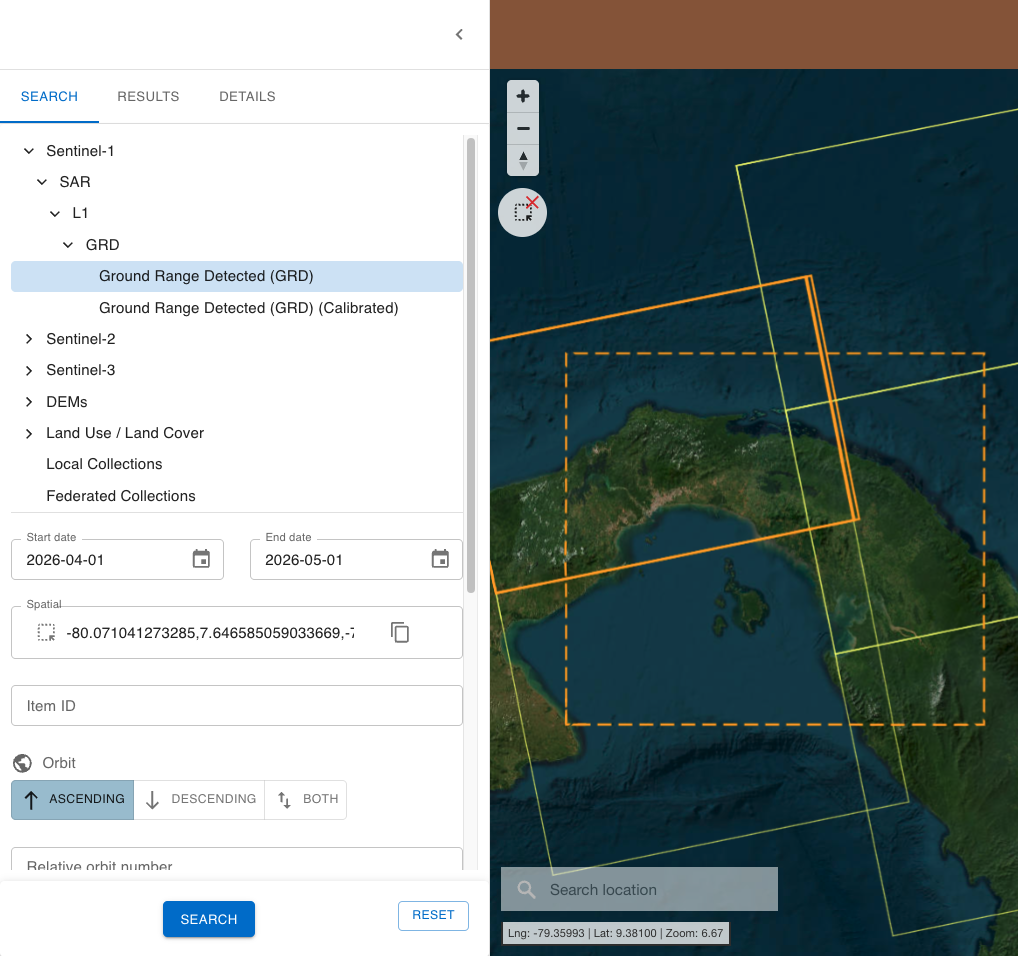
Once all the necessary filters are in place, the user shall click on the SEARCH button to employ a search. The RESET button can be instead used to clear all the inserted values.
Results tab
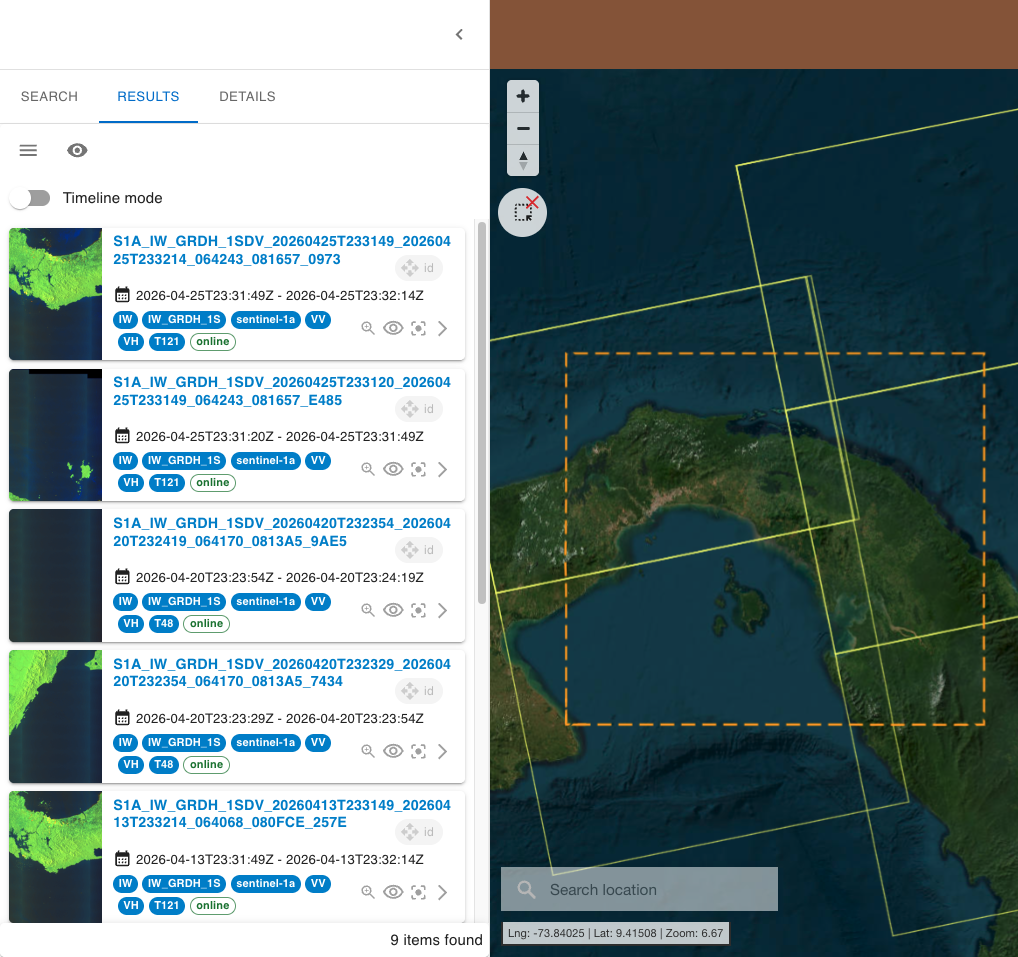
The RESULTS tab provides the result from a search by listing all the obtained features.
For each feature the RESULTS tab provides: title, time range, tags and dedicated features buttons.
Available feature buttons are:
-
Zoom/Pan on item,
-
Hide item,
-
Show only this item,
-
Show item details,
-
Copy to clipboard,
-
The draggable ID icon to be used for drag and drop the feature in a dedicated form (e.g. for processing).
Info
After a mouseover to the title of an item in the list the user can copy to clipboard the catalog reference of the item.
Details tab
After a click on an item listed under the RESULTS tab, the left panel will switch to the DETAILS tab and only the single selected item will be visible on the map.
In the DETAILS tab the user can find metadata of the product (e.g. product ID, datetime, resolution, etc.) that is displayed and ordered by following the STAC specifications.
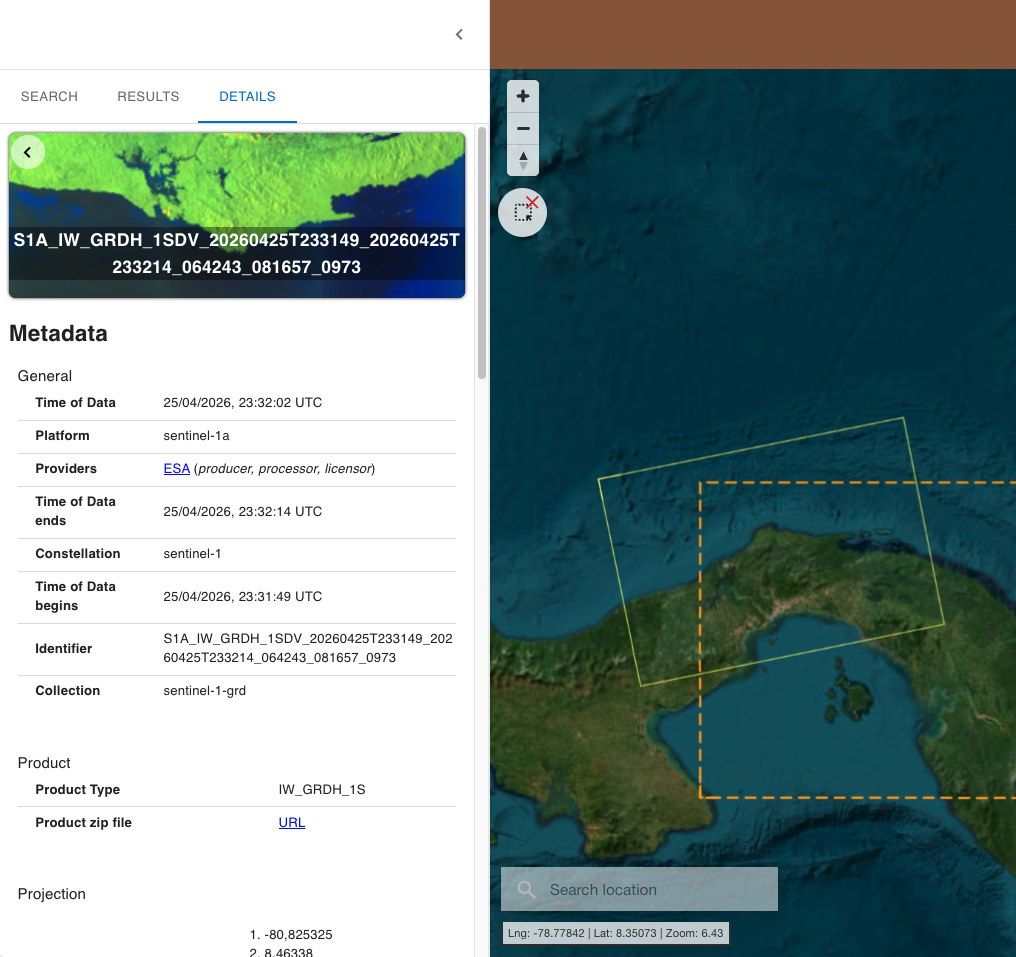
When possible the user can also find legend, select the layer to be shown in the map with its pre-defined render options and customize the view (e.g. set transparency level).
From this panel the used can also download the original product by clicking on the available hyperlinks listed under Downloads.
Map
-
Geo Location Search: providing a widget to search items over the bounding box of a location of interest
-
Basemap Control Panel: providing a list of selectable base layers and a button for switching among a 2D or a 3D view of the map
-
Map Navigation buttons: offering dedicated buttons to adjust the map view: zoom in/out, rotate and tilt.
Map Navigation buttons
On the top left corner of the map is located the Map Navigation Panel. Using the available Map Navigation buttons the user can:
-
Zoom in: left click on the + button
-
Zoom out: left click on the - button
-
Change the viewing angle by setting inclination and orientation: left click and hold the compass button while dragging left and right or up and down.
-
Reset bearing to the north: left click on the compass button
Hint
In the 3D view the user can tilt the map in any direction. The 3D tilt control is useful to view hills and mountains.
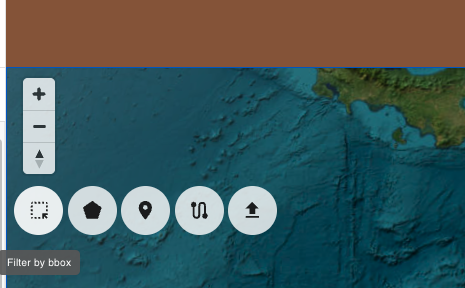
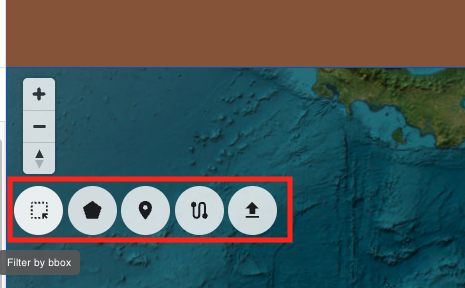
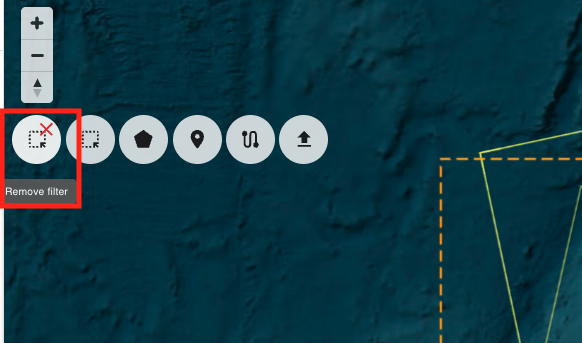
Spatial filter widget
Just below the Map Navigation buttons is located the Spatial filtering widget. It provides the following buttons:
-
Filter by bbox,
-
Filter by polygon,
-
Filter by point,
-
Filter by line string,
-
Filter by AOI import.
This widget can be used for instance to find items falling inside a custom bounding box. After the drawing of a square in the map with the Filter by bbox, the user can employ this geometry in the search to retrieve the intersecting products from all the items of a layer.
To remove the spatial filter just click on the Remove filter icon.
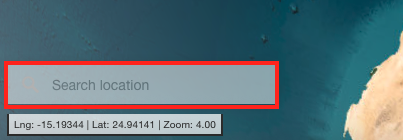
Geo Location search
Search location: the Search location widget can be used to find items falling inside the bounding box of a location of interest. After the insertion of the name of a location of interest (e.g. a city, a region, a province), the system automatically derives the bounding box of the geolocation layer for that municipality, and employs this geometry to retrieve the intersecting products from all the items of a layer.
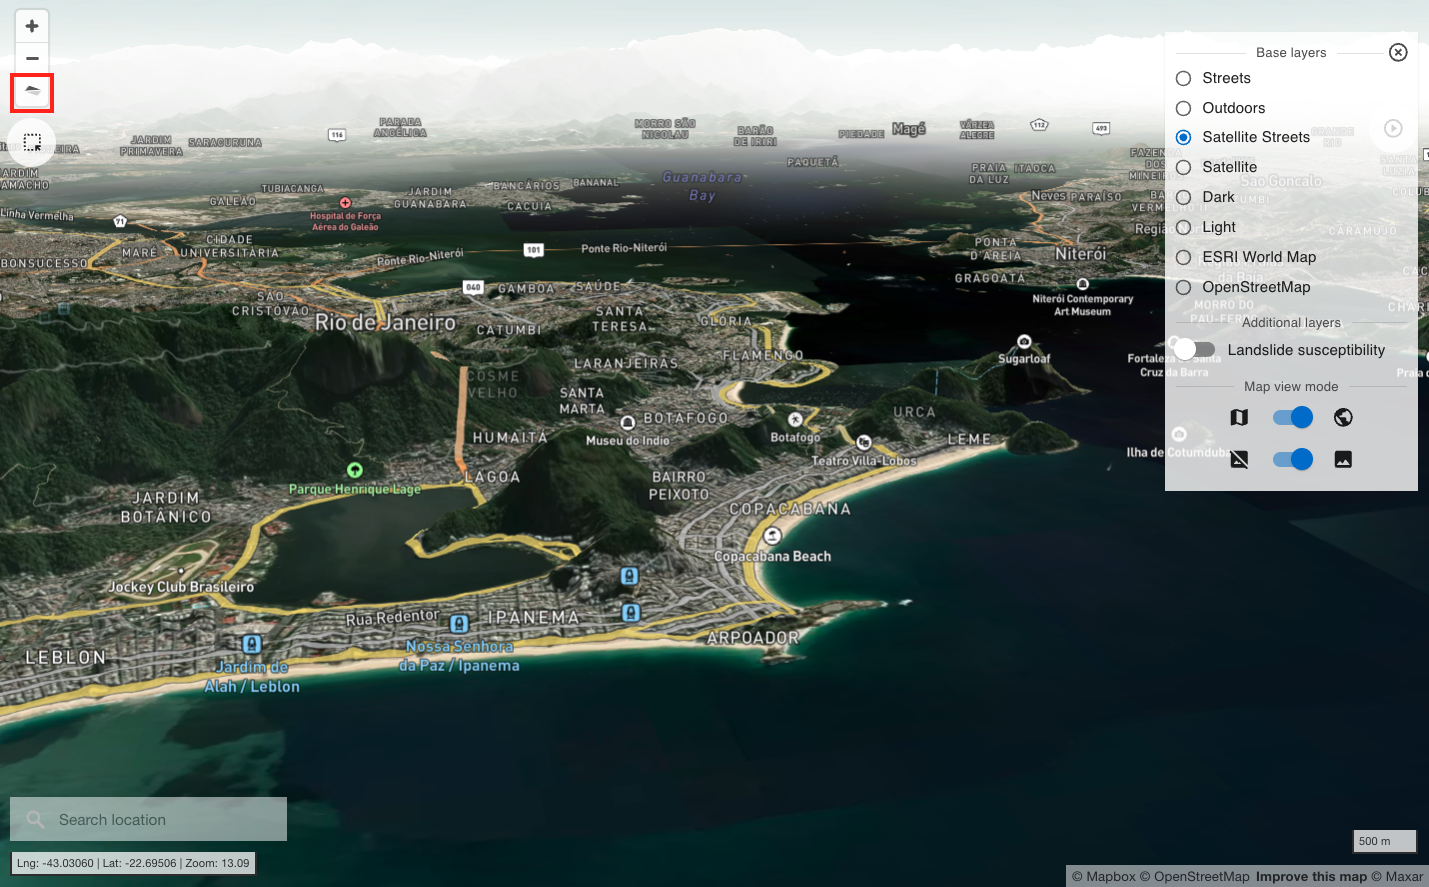
Basemap Control Panel
On the top right corner of the map is located the Basemap Control Panel where the user can change the base layer and switch between a 3D or a 2D view of the map,
In the Basemap Control panel the user can change the default background map with another one (e.g. the Light base layer) by clicking on the desired base layer from the list:
-
Streets
-
Outdoors
-
Satellite Streets
-
Satellite
-
Dark
-
Light
-
ESRI World Map
-
Countries
The default baselayer is the ESRI World Map one.
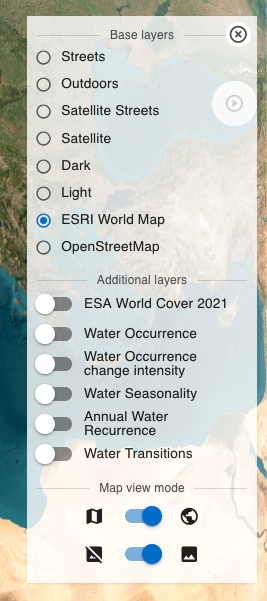
From the Base map panel it is also possible to switch from the 3D to a plane view of the map by clicking on the dedicated button located just below the list of base layers. By default the 3D view is selected.
Right panel
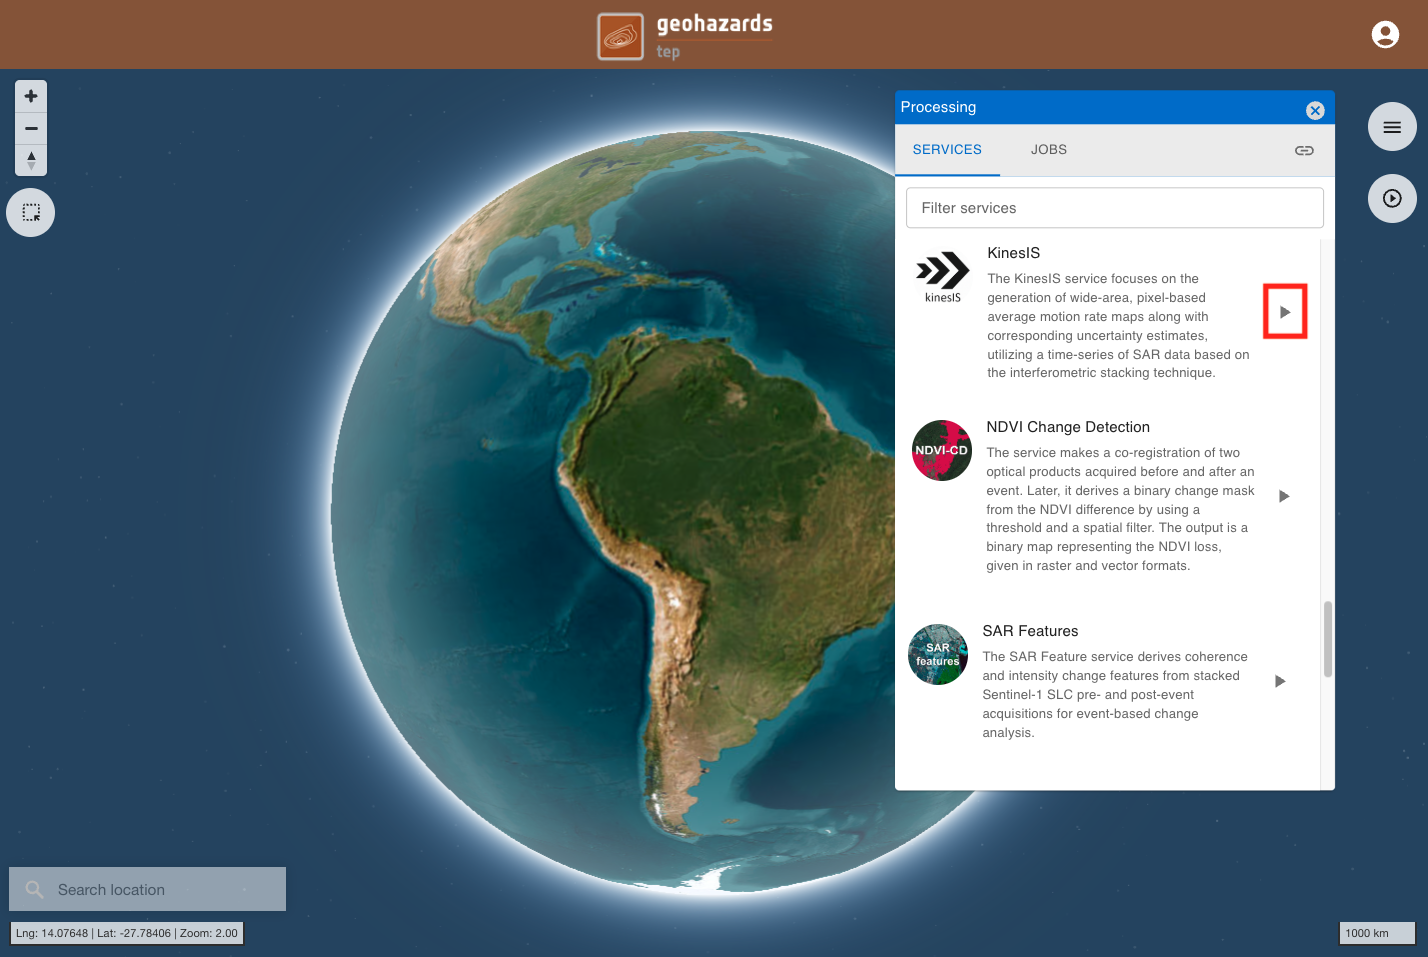
On the right is located the panel dedicated for on-demand processing. The user can open the Processing Services panel by clicking on the :octicons-play-16: button located on the top right of the map.
Services tab
The Processing panel will be displayed with the list of on-demand services available for this workspace.
To access the service description and service form tabs the user shall click on the :material-play: button next to the desired service.
This tab provides a quick description of the service. In the upper part of the tab are shown:
-
service full name,
-
service caption,
-
hyperlink to the online documentation
-
version of the service.
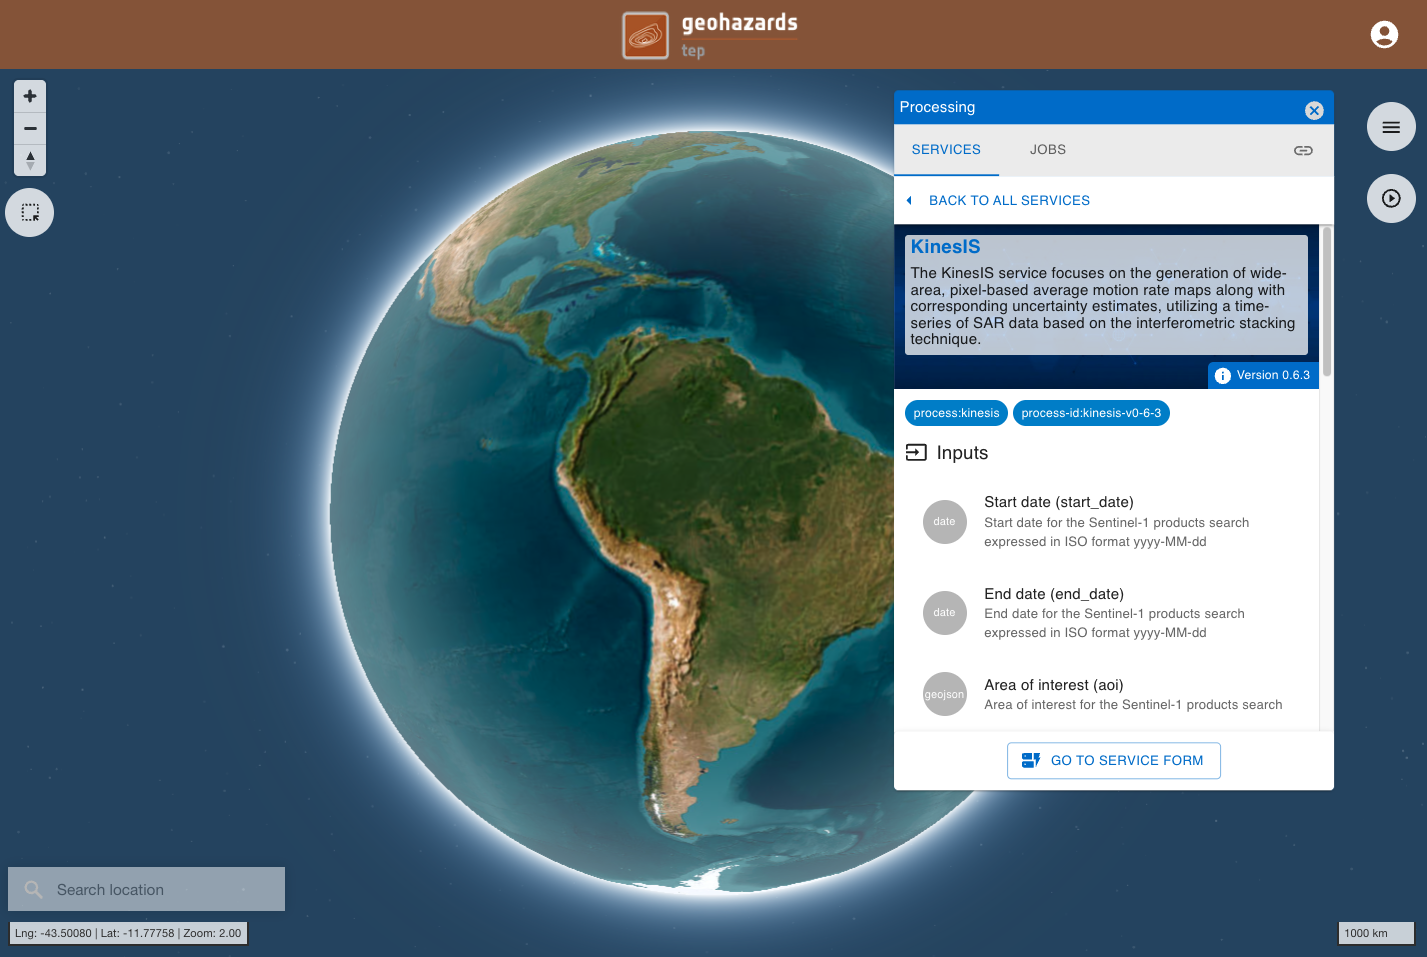
Below this description are listed all mandatory and optional parameters that the user must define when submitting the on-demand processing. Each parameter is described with:
-
a grey circle on the left indicating the format of input value required for the parameter. As an example if the parameter is a string (e.g. catalog reference) or a number (e.g. a threshold),
-
the identifier of the parameter,
-
a brief description of the parameter.
At the bottom of the tab is located the GO TO SERVICE FORM button. The user shall click on it to move to the next tab where it is possible to fill-in all service parameters and submit the on-demand job.
Hint
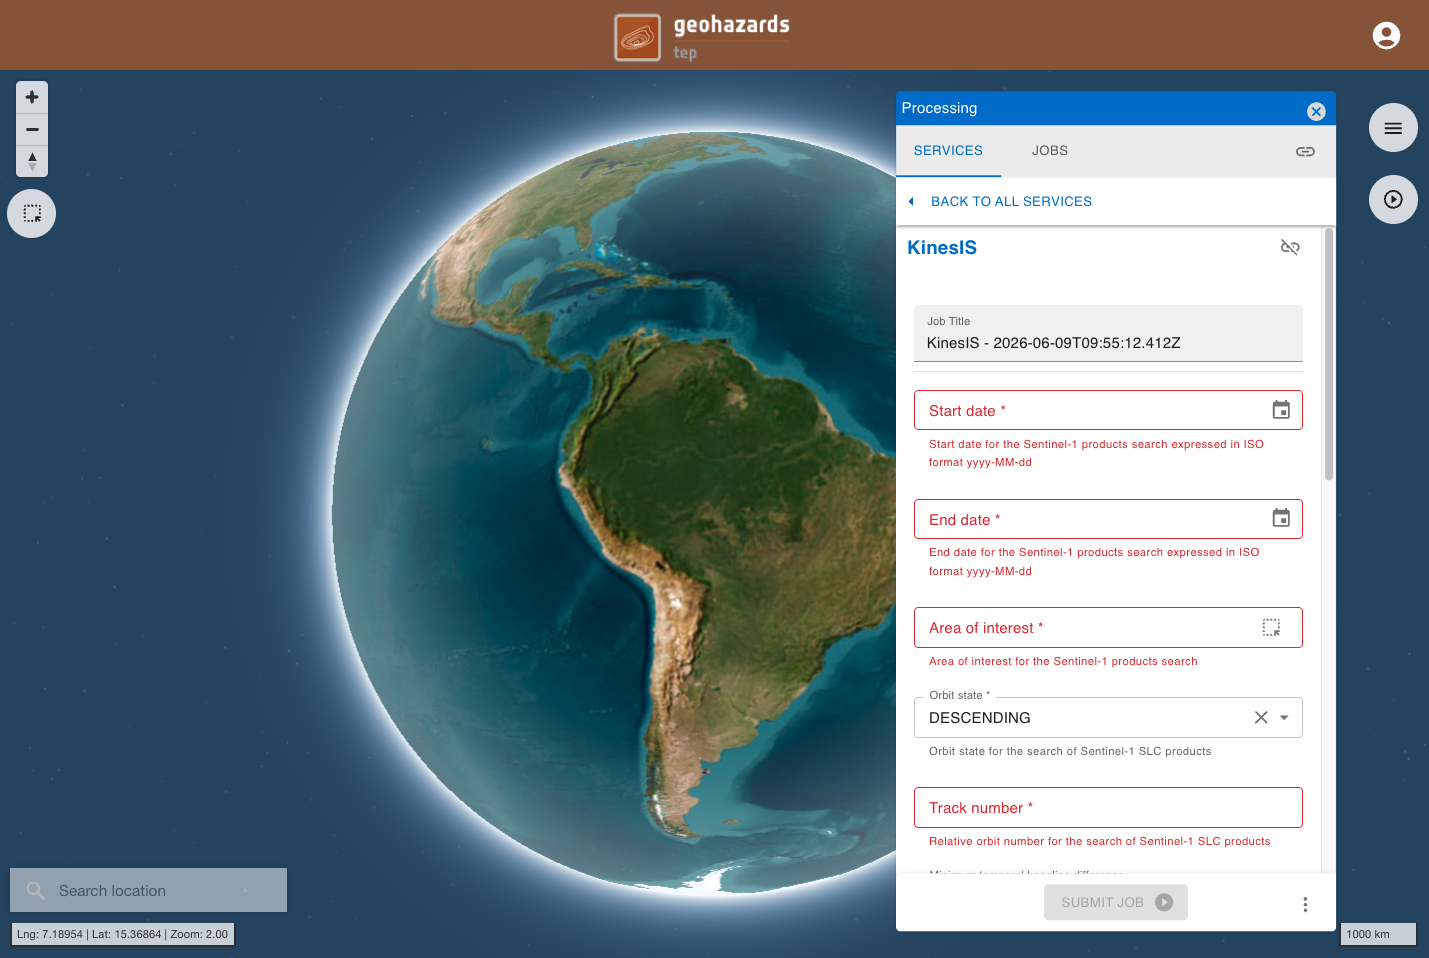
To go back to the service panel click on the BACK TO ALL SERVICES button.
After filling in all the required parameters, click SUBMIT JOB to start the service.
Jobs tab
Once submitted, the user will be automatically redirected to the JOBS tab, where it is possible to view the list of all previously submitted jobs. The newly created job will appear at the top of the list.
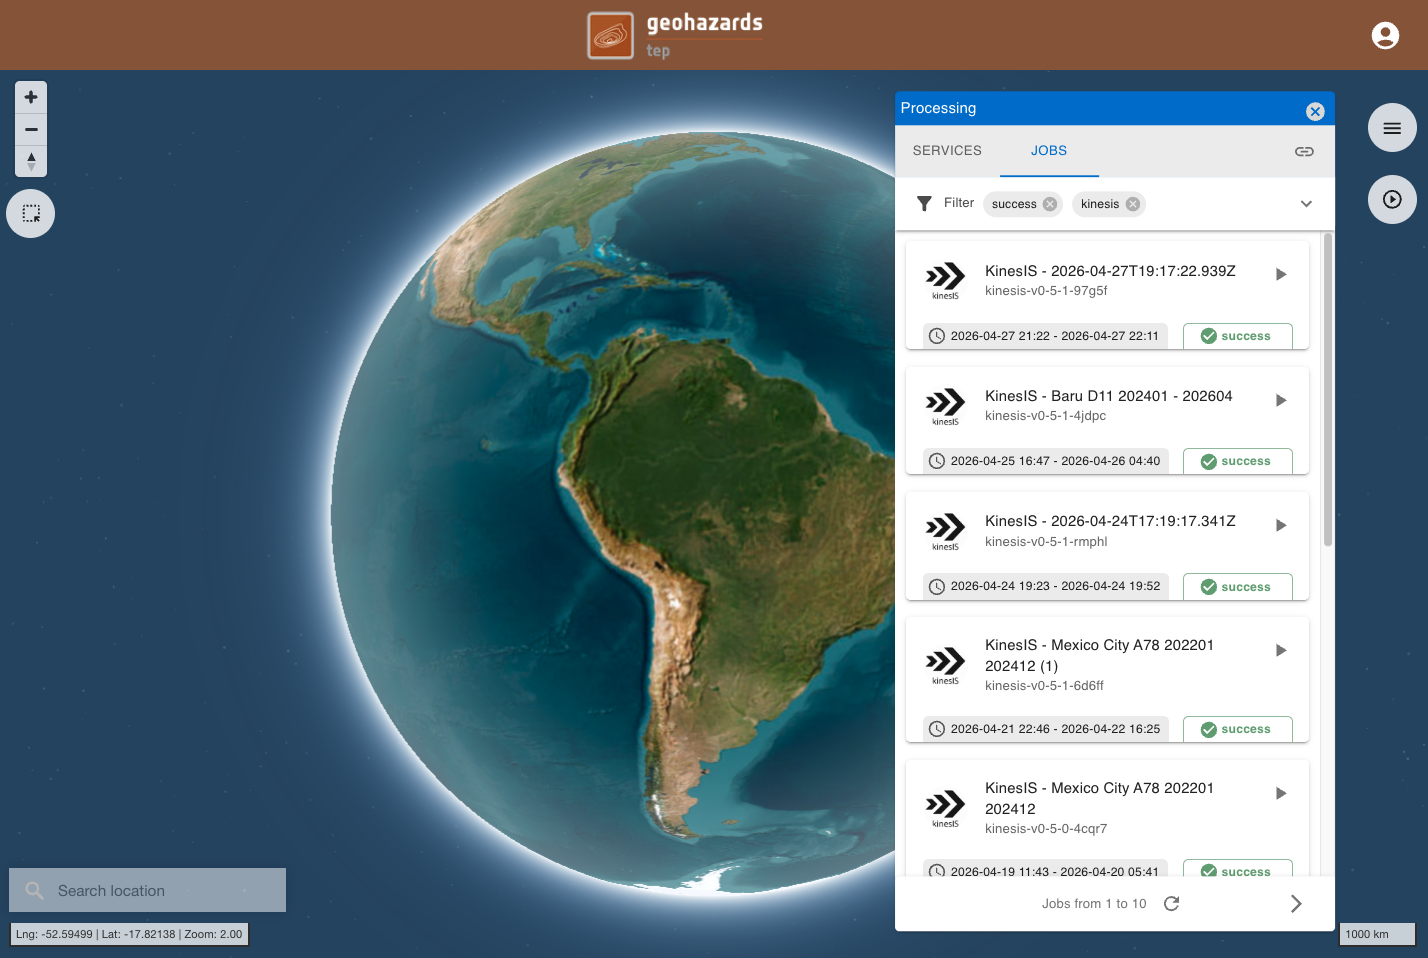
From this tab, the user can monitor the progress of the job, which can have one of the following statuses: running, succeeded or failed.
Once the job is successfully accomplished, the user can click on the :material-play: button next to the title of the job.
Under the job details click on the button SHOW RESULTS ON MAP located in the JOBS tab of the left panel.
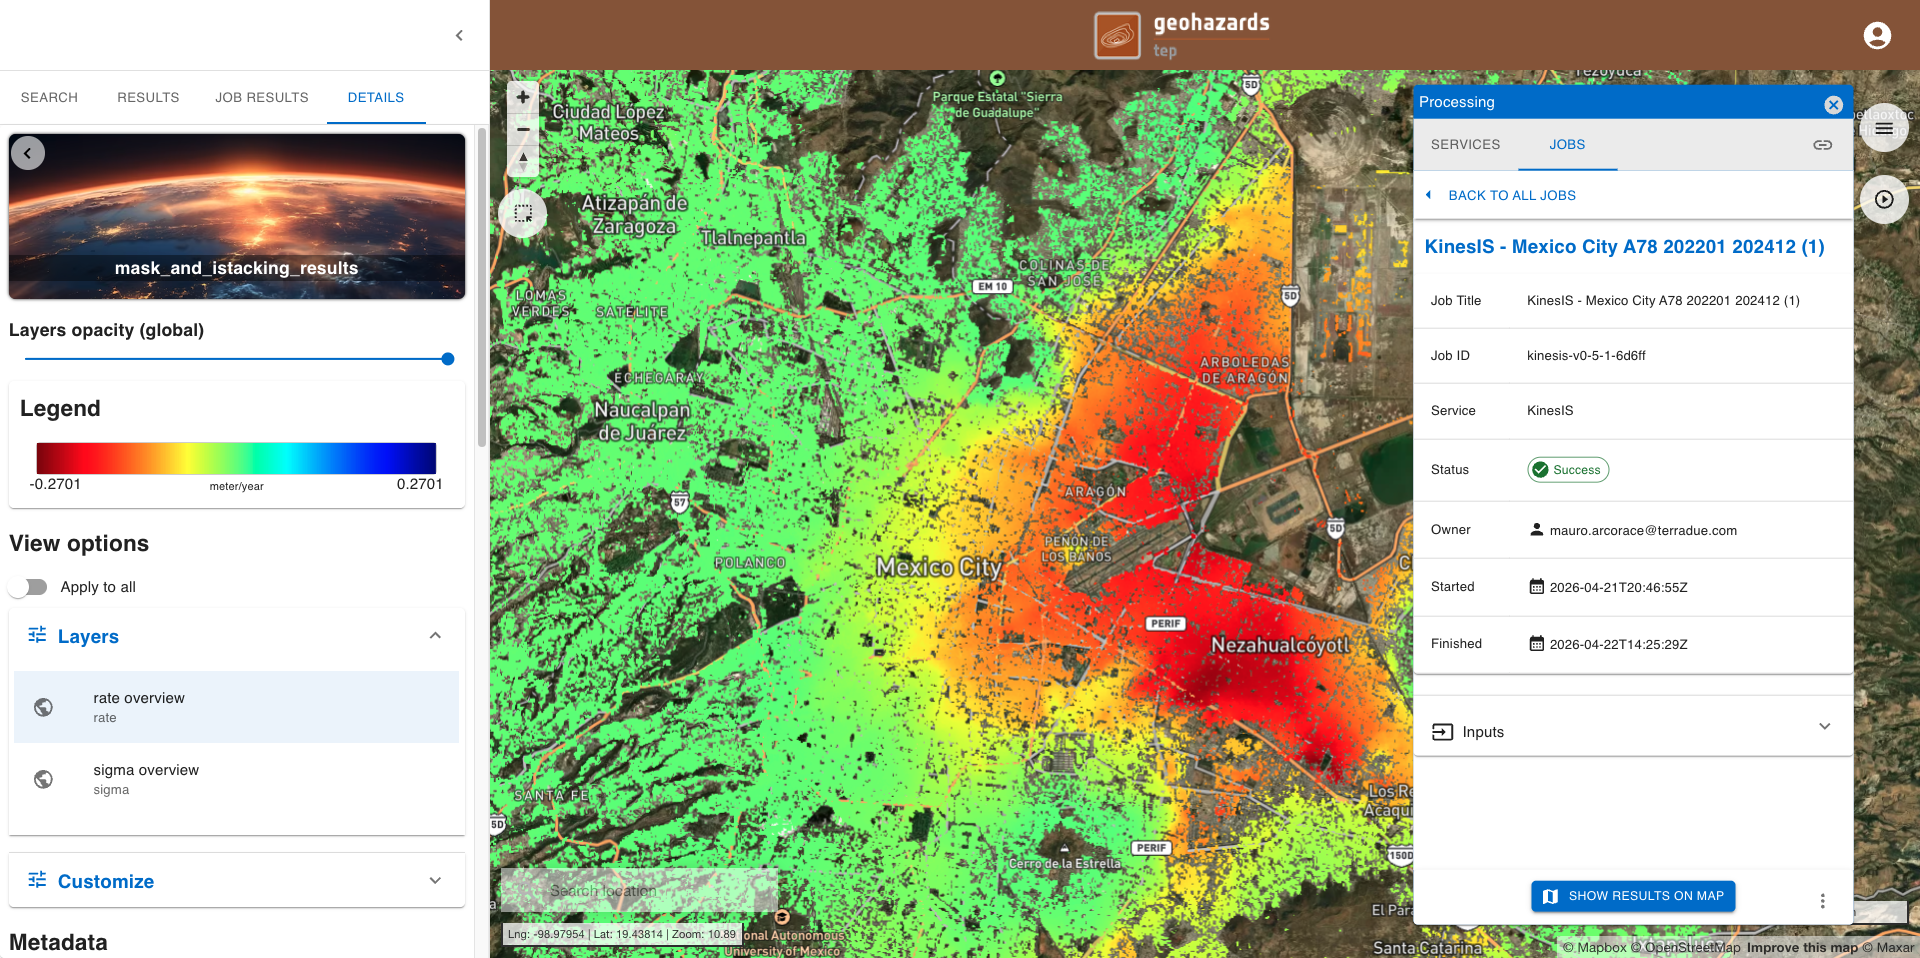
After that, all the products generated by the service will be displayed on the map.
On the left panel under the DETAILS tab is shown a list with the layers that the user can visualize on the map.
By default the layer shown on the map is the first one from the list. From the DETAILS tab in the left panel it is also possible to:
-
set the opacity of the layer,
-
visualize the legend of the product,
-
under view options consult the render applied to the layer and, its histogram (when available), and apply a custom render,
-
download the product.
From the left panel the user can consult the Metadata available. It is possible for instance to find more information about how to interpret the result under Description, or how to retrieve the list of IDs of the EO data product employed by the service under Derived from.
Hint
Do you want to see both the result and the underneath satellite imagery baselayer? Try using the Layers opacity (global) bar, and set the opacity as 50% to better see for instance also the labels of the basemap layer.
Note
Aren't you satisfied with the default render of the product available under Layers in the View options? You can customize it by clicking on Customize under View options in the left panel. Please note that when you apply a custom render to the asset the legend will be updated accordingly.
To download the product from the left panel click on the :material-download: Downloads dropdown button and then on the hyperlink to download one of the assets generated by the service.